 Rain. Rain, rain, rain. There’s been a lot of it. We are lucky in the Northeast not to be dealing with the floods that have ravaged the middle of the country, but still: rain. It gets you down when days and days go by with no sight of the sun and the incessant drip, drip, drip of rain off the eaves threatens to drive you ’round the twist. I firmly believe, however, that every cloud has its silver lining: the trees, grass, in fact all the plants in our wooded backyard are soaking up all this rain and it is a wonderland of green out there.
In that wonderland of green, there is a back deck. And on that deck, there is a windowbox planter; just a plastic, rather ugly thing really, that I picked up at some big box store years ago. It lives on the back deck, all year round, because you see, despite the fact that it is ugly, and I would rather tuck it out of site, it is the only way I can grow chives. I buy a plant at the nursery: it dies. I plant seeds: they never germinate. Or three little shoots pop up, then promptly turn yellow and die. About 3 years ago, I planted chive seeds in this ugly windowbox planter, and about three spindly chives popped up and promptly died. But then, I got busy that Fall, and while most of my container garden got composted, scrubbed and tucked away in the garage for the winter, I never got around to dealing with this one windowbox. It sat all winter, through snow & ice, gathering dead leaves and Christmas tree pine needle run-off. It sat and sat. And then, round about April, when I had just been thinking that it was high time I cleaned it out and starting getting ready for the new garden season, a miracle happened: chives! Lots and lots of chives, thick, green, robust. Springing out of this ugly windowbox planter like noboby’s business. Since then I’ve tried replanting them into a mostly-sunny spot in the yard (as good as it gets in our shady green wonderland): no dice. I’ve tried replanting them in a less-ugly container to live on the deck: no joy. So, the ugly container sits, and will continue to sit, year in and year out. Because homegrown, free, miraculous chives? So. Worth. It.
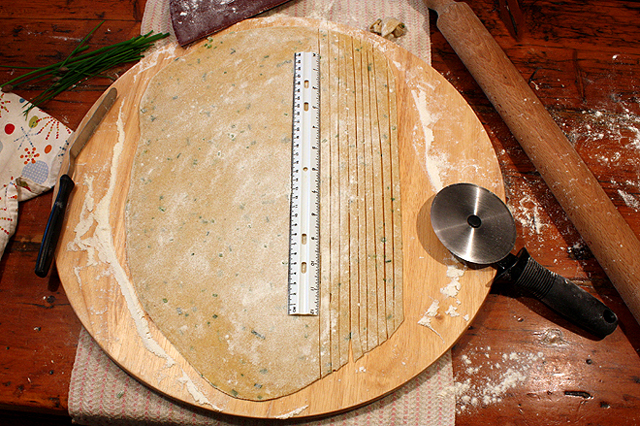
This pasta is light and Springy, just what the doctor ordered for the it’s-been-raining-for-weeks-blues. And while homemade pasta seems like a crazy all-day task, it’s actually pretty quick & easy to make. I don’t have a pasta machine, so I roll and cut mine by hand (and anally cut my noodles with a ruler; I’m a perfectionist. So sue me.) but even so, it doesn’t take any longer than whipping up a stir-fry. Handmade pasta with magical back-deck chives, FTW. Whip some up tonight: you might even forget, for a few moments, about the rain.
———————————————————–
INGREDIENTS
- 1/4 cup (1 and 1/8 oz) whole wheat bread flour (hard red spring wheat)
- 1 and 3/4 cups (7 and 7/8 oz, for a total of 9 oz flour) whole wheat pastry flour
- 1/4 tsp salt
- 1/8 tsp freshly ground black pepper
- 2 eggs
- 1 small bunch chives, finely minced (about 3 tbsp)
- water (I needed only 3 tbsp in this damp weather)
METHODS
- Mix the flours and salt in a large bowl.
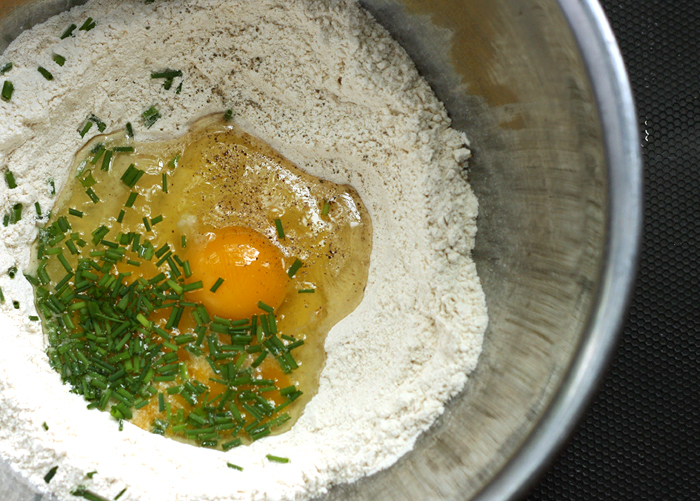
- Make a well in the flour, add the eggs to the middle, and add 2 tbsp of the water. Beat eggs with a fork or your fingers, then mix together with flour to form a soft dough; add more water, 1 tbsp at a time, until a soft but not sticky dough forms.
- Turn out onto a floured board and knead, flouring as needed, until dough is smooth and elastic, about 5 minutes. Double-wrap tightly in plastic wrap and refrigerate for at least 30 minutes, or overnight.
- Chop dough into 3 roughly equal pieces. Return 2 pieces to the refrigerator; pat the remaining piece into a rectangle. Using a floured rolling pin and work surface, roll dough out as thinly as possible (sprinkling additional minced chives over the surface if desired), into a rectangular shape. Loosen dough frequently, flouring the work surface, so that it does not stick. Using a ruler and a sharp knife or pizza wheel, cut the rectangle into ribbons, trying to keep them approximately the same size (so that they will cook evenly). Transfer noodles to a well-floured clean kitchen towel and allow to air-dry for at least 15 minutes (this helps maintain consistency and shape upon boiling). Repeat with remaining dough.

- Bring a large pot of well-salted water to boil. Add pasta; replace cover on the pot until water returns to a vigorous boil. Cook at a high boil until pasta is al dente, about 2 or 3 minutes. Drain and toss with your favorite sauce; serve immediately.
Serves 4 – 6.
- Those with egg allergies can substitute water and/or olive oil. I noticed today that Ruhlman just posted on homemade pasta as well (great minds; I, too make my pasta dough in a bowl). His recipe uses 3 eggs to 9 oz of flour and no water. I like my pasta a little less eggy, but for you egg-lovers out there (oviphiles?), feel free to sub in an extra egg for the water.
- Any sort of finely minced Spring herb would work nicely; ramp greens, garlic chives, dandelion greens, parsley.
- I like whole wheat pastry flour in this because the fine grain makes it much easier to roll out by hand, and it holds together better than a coarser flour. If you have a pasta machine, you might consider increasing the amount of bread flour for a nuttier, more robust wheat flavor and more dense texture.
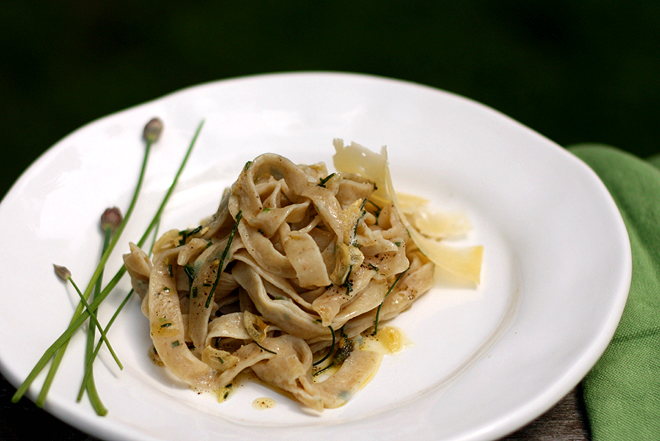
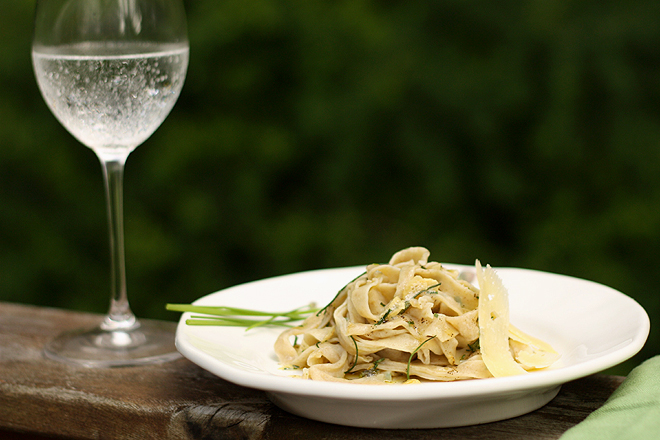
- I served this with a very simple sauce: butter, olive oil, a sliced garlic clove, snipped chives, salt & pepper. Sautéed briefly to melt the butter and mellow the garlic, then tossed with the noodles. Garnished with extra chives and a shaving or two of aged goat cheese, it was fabulous. The noodles are the star here: they don’t need much to improve them.
STORE
After a drying time of 15 – 60 minutes, fresh pasta can be stored refrigerated for up to 3 days. You can leave the noodles out on the floured towel, or drape them over a rod, to dry permanently (which will take 24 – 48 hrs), however, I am not sure about the fresh chives. They may dehydrate without issue, but they may mold. I haven’t tried it yet. Anyone else?
SEASON
Spring. Rainy, rainy Spring.


We have invested in the pasta attachment for my KitchenAid, making it so quick and easy to make pasta. I am going to give your recipe a try 🙂
um… that sounds tasty 🙂
Plants can be stubborn little beasts. I love that they refuse to grow anywhere but your magical planter of ugliness. Maybe you could give it a paint job or bedazzle the crap out of it 😉 If you really do love to make pasta I really do recomend a pasta machine. It will save you some time to figure out how to make that planter less of an eye sore! I remember making pasta with my mom when I was growing up. My job was to crank the handle. Now that job has passed to my kids.
I kind of love it too; it’s frustrating, but sort of endearing, that they refuse to grow anywhere else. And although I have to giggle at the thought of a Bedazzled Magical Chive Planter, I’m not sure how they will react. Like teenagers who are actually doing their homework, I’m afraid to break the spell.
And, yes, the pasta machine is on the “someday” list. There’s a long list and a limited budget, but mostly the problem is the 69 square-foot kitchen. I’m sure it”ll happen eventually, but for now, I don’t mind rolling it out. It’s relaxing, actually, and a great break from sitting at the computer all day.
Awesome !! Ill have to give this a try soon 🙂 I have more chives than I know what to do with , all from a small $1 plant a dozen years ago. Only one year did I have a bad crop of them , and have successfully given them to at least 10 people over the years . Did you take out a nice chunk of soil when trying to move them ? EIther that or let a few go to seed, and use those to populate your other areas.
Rich – I’ve tried it all. I decided to stop pushing my luck and not look a magic windowbox in the mouth. 🙂
I’ve had good luck freezing chives; they don’t stay crisp upon thawing, of course, but they still add a nice oniony flavor to fritatta or soup straight from the freezer. Also cheddar chive scones is one of my go-to use-up-chives recipes: savory scone goodness.
Lovely! I haven’t tried making pasta dough in bowl (just the food processor and by hand). I think whole wheat flour is a nice flour to use here because it makes sure that even though it’s lightly dressed pasta in the end, it’s still got some depth of flavor.
making homemade pasta has been on my list forever. I really need to do it and your recipe looks lovely. btw I love that you use a ruler, I mean as far as I’m concerned, why wouldn’t you? 😉
1) freezing chives? why haven’t i thought of this? i toss everything in the freezer to see what happens. can’t wait.
2) the planter? love it! I hope someday I find my magic dill spot or cilantro spot because my luck with either is like your previous luck w/ chives.
3) the ruler? you are killing me, esp. loving the ruler picture. =)
4) why am I making a list? i have no idea. But yum. Chive pasta sounds rockin’ good!
I use to freeze chives at the end of the season. Just snip them (I always use scissors) into 18″-14″ pieces by the handful and put ’em in a ziplock bag. They work beautifully but as already stated, lose their crispness. I’ve had them last all the way to the next new shoots in spring. Now I’m in the city and attempting to start some from seed…we’ll see how that goes.
Thanks for a great post!
That was meant to be one eighth to one quarter inch pieces. The slash character apparently doesn’t read. Those would be some bodacious chives…LOL.
That ruler picture, well, rules! You are amazing. My chives did the same thing; very sparse then came back the next year thick and beautiful. Fresh pasta is a thing of the gods; this is reminding me to make some of this loveliness!
You know, now that I look at it again, I realize it probably would have been easier to just use the rolling pin as a guide to cut the noodles. Duh. (but then I wouldn’t have gotten to break out my trusty ruler. Which is from college. Which makes it an antique by now, methinks…)
Yum. I have yet to make my own pasta. Not sure what I’m waiting for. Thanks for reminding me that I don’t need to wait for a pasta roller. I do have a ruler in stock 🙂
Lovely – looks so springy and tasty.
Pingback: {recipe link love} CSA Program on the Road « FROM SCRATCH CLUB
Pingback: My first CSA share! | lotuscat
I tried this with a fine rye flour and it added a peppery flavor that was fantastic!