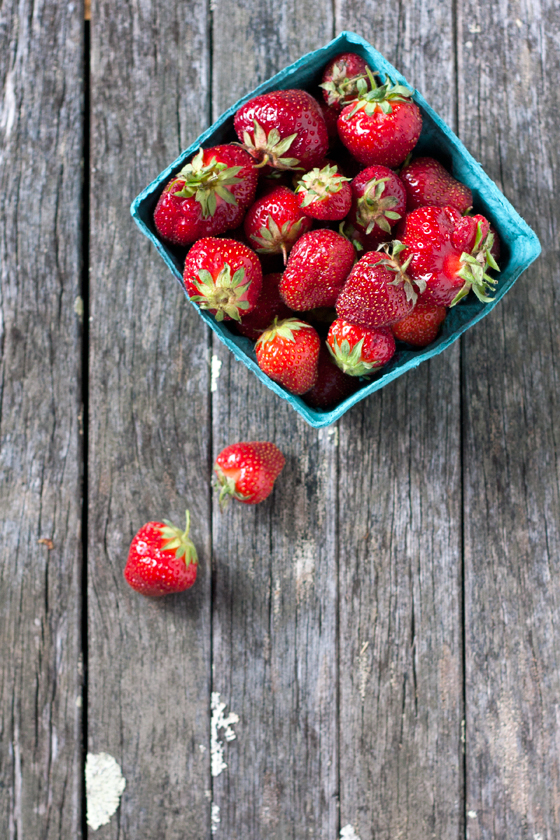
 It’s that time of year again: the time when I’m buying an armful of rhubarb, or a flat of berries, or pound after pound of peaches, and some innocent, unsuspecting stranger asks brightly, “What are you going to make?”
The reactions I get when I tell people that I make jam run the full gamut from Stewie to serious side eye to the Patrick Stewart quadruple take. At the farmer’s market last summer, one woman even told me, “Girl, ain’t nobody got time for that.”
And, hey, I get it. If cooking’s not your thing, if just getting dinner on the table is a major accomplishment, if every farmer’s market you go to is stuffed to the gills with tables full o’ jam, why make it? But I am sort of befuddled by the people who think nothing of whipping up a pan of brownies, a batch of cupcakes, or Sunday morning waffles, but think that a simple berry jam is beyond them. I’m here to tell you: it is not.
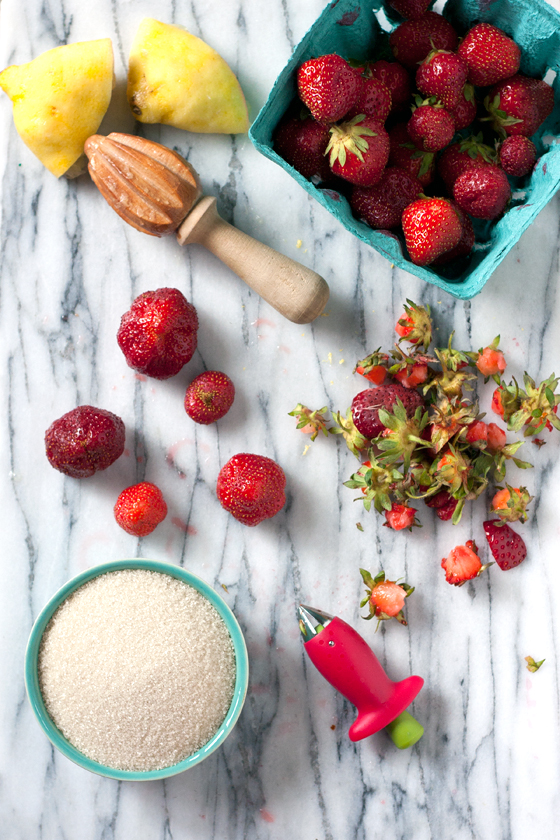
 Miss Kate taught me this trick a few years ago, at one of her jam-making demos at the Coventry Farmer’s Market: 1 quart of berries, 1 cup of sugar, 1 lemon. That’s it: no measuring, no pectin, no vats of boiling water, no arrays of surgically clean canning tools, no nervous breakdown: just berries, sugar, lemon. Let them sit in a bowl together long enough to drink a glass of wine, then pop in a skillet for 10 – 15 minutes and hey, presto! Jam.
A small batch like this is perfect for strawberries, because they can be more finicky than other jam fruits: they are low in natural pectin, making it more challenging to achieve a set; their water content can vary dramatically from season to season, changing the amount of cooking time required to achieve a set; their bright berry flavor is more delicate than, say, cherries or blueberries, so you want to cook them for as short a time as possible to preserve the freshest flavor. The 1:1:1 ratio small batch, cooked in my biggest skillet, has yet to fail me. Even if you don’t can, you can jam. I promise.
Adapted from No-Can Strawberry Jam by Hip Girl Kate (via Linda Z and David Lebovitz)
 Simple Strawberry Skillet Jam
INGREDIENTS
- 1 quart strawberries
- 1 cup sugar
- 1 lemon
METHODS
- Rinse and hull berries. Slice large berries in half or quarters; leave the small ones whole. Zest & juice the lemon: add to the berry bowl. Add sugar, then toss it all together until mixed well. Let macerate at room temperature for at least 30 minutes. At this point, you can stick the berries in the fridge, covered, and let them sit for a few days if need be.
- Walk away. Enjoy a glass of wine on the porch. Think about how easy jam making really is. Wonder if it’s Sunday and Game of Thrones is on. Remember that Game of Thrones is over for another year. Be sad. Have another glass of wine.
- Dump the berries + juice into your largest skillet (I use a 13-inch Staub. No seasoned cast iron here; the acidic berries will strip your hard-won seasoning). Bring to a boil over medium-high heat. Raise heat to high and boil, without stirring, until berries have cooked well down, darkened, and are bubbling thickly, about 10 – 15 minutes. Strawberries will foam – a lot. If you like, add a pat of butter or a splash of olive oil to tame the foam.
- After about 10 minutes, give it a small test stir. When you can make a stripe of clean skillet with your spatula that doesn’t immediately fill in, the jam is done. Scrape it into a jar. Stick it in the fridge. Pat yourself on the back for a jam well done. Celebrate with a glass of wine.
Yields about a pint of jam, or a bit less.
 OPTIONS
- I added a sprig of fresh mint during the macerating step. Mint, basil, oregano, thyme: they all go nicely with strawberry. Remove fresh herbs before cooking jam.
- A vanilla bean is nice in strawberry jam as well. You can leave it in during cooking and storage if you like.
- Don’t skip the macerating step: it helps to draw the juice out of the berries and distribute the pectin evenly throughout the berry-juice mixture, allowing the jam to cook & set-up more quickly.
- You can, of course, water bath process this small batch if you like: it is safely acidic to do so. Fill jars to ¼-inch and process for 10 minutes.
STORE
Refrigerated for about 3 to 4 weeks.
SEASON
Summer.

I can just smell the jam!!! Delicious!
Wow – looks fabulous! I’m going to try this out soon. Thank you!
Isn’t summer just wonderful? Any times when strawberries are in season is a good time for me!!!
That strawberry skillet jam looks very appetizing!!
Looks delicious! Yum… 🙂
WOW! Beautiful pictures and delicious looking jam… Strawberries are one of my favorite fruits to work with in the kitchen! Cant wait to try!
Looks so yummy! Love the jar too.
Can this jam go in the freezer too?
It can, but I honestly don’t have great luck with jam in the freezer. Freezing affects the set, and upon thawing the jam is likely to be watery and/or separated. Freezer jam usually contains a lot more sugar and added pectin in order to keep it jelled.
ok, thanks for the recipe!
Reblogged this on darlingtonfrancis.
I love fruit spreads but I need some ideas on what else to do with them aside from bread topping. This looks decadent!
Hi Donna,
If you scroll through the “use it or lose it!” category, you’ll find ideas for using up all sorts of preserves, including jam. From crumb bars & cookies to glazing & braising meats, there are plenty of recipes for jam that don’t involve toast. 🙂 https://localkitchenblog.com/category/type-of-dish/use-it-or-lose-it/
After reading the procedure I think making jam is easier than baking cookies and chocolates, Skillet jam just looks awesome and is so simple to make, Will try it soon. Thanks for sharing Kaela.
It really is. Do try it out!
Nham!!!
Reblogged this on kissingyourmouth.
This is so lovely and looks so easy! cannot wait for our strawberry season to start experimenting with this recipe!
Pingback: Links: Berry Jams, Pickles, and Winners - Food in Jars