 Have you ever noticed how each season’s preserving takes on a life of its own? Sure, you have the standards that you put up every year: canned tomatoes, your husband’s favorite pickle, ears and ears of frozen grilled corn. But each season it seems a certain method of preservation wins the day. Either the canning pot is bubbling away non-stop, or you have six different crocks fermenting on the counter, or everything in sight gets spread out in the dehydrator.
There are a few reasons for this, I think. There is that wacky experiment that you tried that came out fabulously: thereafter everything you can think of goes into the dehydrator, hoping to recreate success. Sometimes it’s dictated by the weather: it’s too hot & humid to even think of firing up the oven or the canning pot, so everything and anything goes into the Crock-Pot. And sometimes it’s dependent on the season: a cool, crisp summer that is overflowing with cabbage and greens may mean kimchi for days and days. This year? This year’s all about the freezer.
I’ve always felt the tiniest twinge of Yankee guilt about the freezer. It’s so easy, you see. Too easy really, and the preserving geek in me is always thinking about shelf-stable preservation that doesn’t require power inputs. While I wouldn’t actually scoff at anyone who cares enough to preserve even a tiny bit of the season, I have to admit that I might have slid a side eye or two at people who pop whole tomatoes or peaches into the freezer. It feels positively decadent.
But this year? This year I went to Brazil. For a month. In the summer. And then I spent another month (or maybe two) recovering from said Brazilian adventure. And when I crawled out of my post-World Cup cocoon, it was nearly Labor Day and I thought, “Whoa. I have some serious catching up to do.” So this year I’m fully embracing the chilly wonder that is the Garage Chest Freezer.
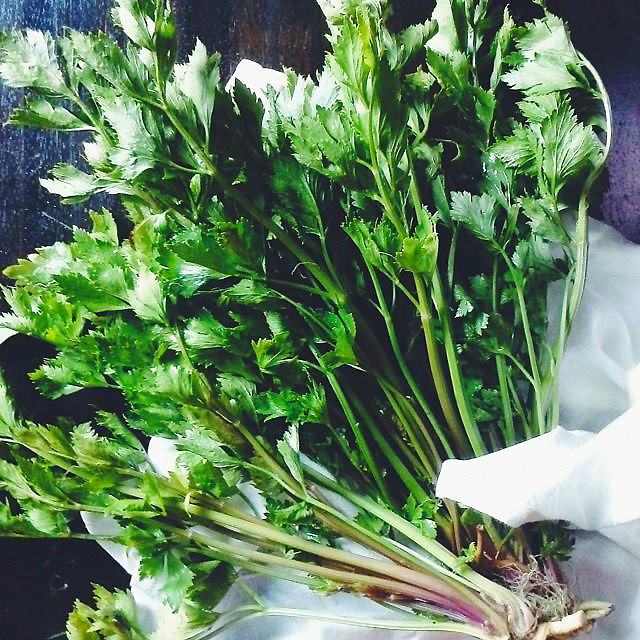 It all started with the celery. A giant bunch of celery from the CSA, that was nonetheless more leaf than stalk. And while celery leaves have more celery flavor than the stalks, they definitely don’t keep as well; stalks may last for several weeks in the fridge, but the leaves typically start to get limp and yellow in a matter of days. Celery also doesn’t freeze well all on its own; when thawed it’s a gloopy mess that hard to do anything with. But cooked down, in a soup or a stew, it’s perfectly fine after a freeze-thaw. Since the amount of celery I had on hand could feed a small stew-loving army, I thought the best plan would be to make soup and stew base: just the sautéed vegetables, frozen with a bit of water or stock, that could be used as a homemade fast food shortcut for busy weeknight soups this winter.
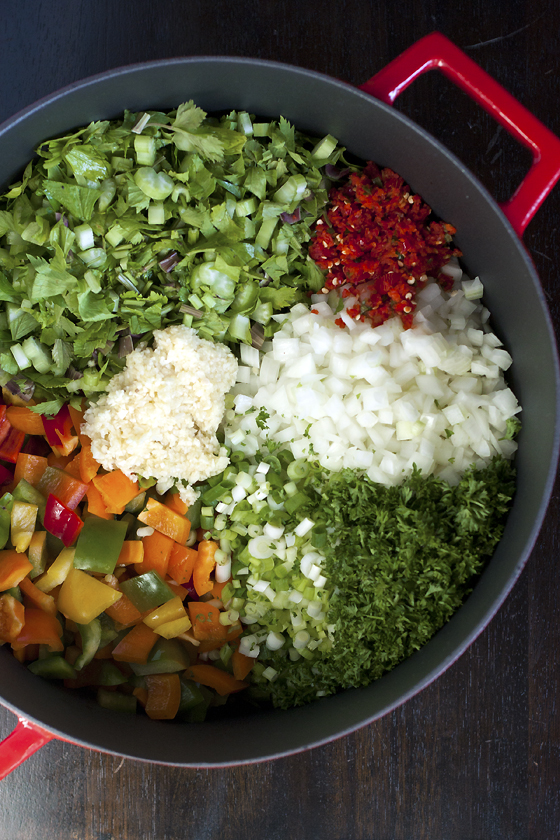
It’s a pretty easy process, really. Most soups and stews start with the basics, the “humble beginnings:” onion, carrot, celery, garlic; bell pepper or tomato; fennel and parsnips. You can either follow the beginning steps of a favorite recipe – I made the base for my chicken soup and gumbo – or you can make a classic vegetable base, like the mirepoix and sofrito outlined below. Cook them down to the point where you would add stock or meat or beans in a recipe; then cool down, pop into jars, and stick ’em in the freezer. Like I said: almost too easy.
 PREPARING & FREEZING SOUP BASE
A few general tips:
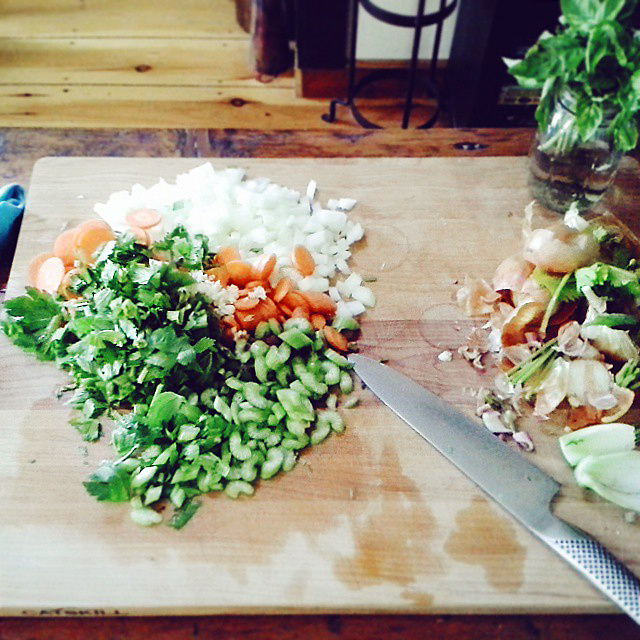
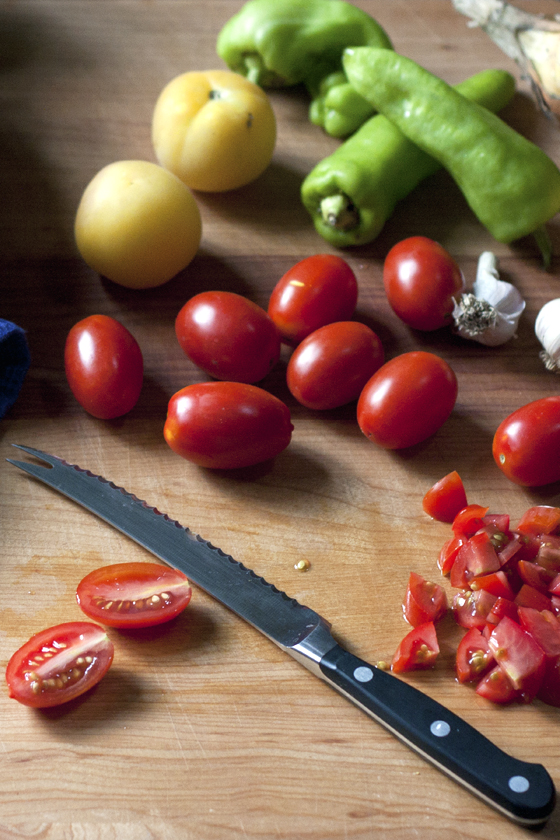
Sharpen your knives. Really. Reducing a huge pile of vegetables to a nicely even dice is an exercise in knife skills. It will be so much easier, faster, and more pleasant with freshly sharpened knives.
Wear comfortable shoes. Again, if you’re tackling a big pile of vegetables, like the image above, unless you’re a prep cook or working chef, it’s going to take you a while. Your feet, neck and back will thank you.
Use your biggest pot. If you are making a double or triple batch of your favorite soup/stew base, you’ll want the largest surface area possible so the vegetables sauté instead of steam. Consider a large skillet or bust out the BAP (Big. Ass. Pot.) for this one.
Salt as you go. Liberally sprinkle vegetables with salt as you cook them down. They absorb the salt best as they are cooking and you’ll end up with a more flavorful soup base than if you just add salt for flavoring at the end. Any ground spices or dried herbs can be added at this time as well. I generally leave fresh herbs to the end of the cooking time for most soups & stews, unless I have some to preserve (for instance I had a large bunch of dill that I added to the chicken soup base).
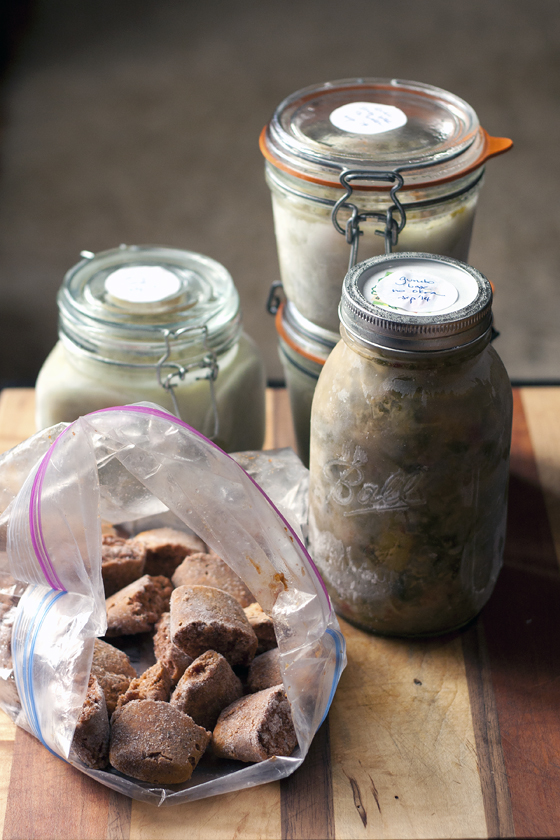
 I freeze in glass. I never plan well enough ahead to pull something out of the freezer the day before I need it and I don’t want to be tempted to microwave something stored in plastic. In order of preference, I freeze in:
- Weck jars. I like Weck the best: the glass is sturdy, holds up well, stacks in the freezer, and you can remove the metal clips for easy microwaving.
- Wide-mouth Ball pint jars are my second choice. You need to leave plenty of head space, but I find the smaller size and straight sides prevent most of the breakage that I encounter with the standard-mouth jars and quart sizes.
- Sturdy European wire bail jars, like Le Parfait and Fido, are my third choice. They hold up very well (I’ve never broken one) but the metal precludes microwaving, so we run into my lack-of-planning problem. But I’ll use them in a pinch.
- Wide-mouth Ball quart jars. Better than the standard-mouth pint jars, but not as good as the pint jars. Breakage can be a problem.
- Glass tupperware-style food storage containers are great, but I never seem to have a small enough size, and I usually want them for fridge storage, so I use them rarely for freezing.
- Standard-mouth Ball quart jars. I find they break upon freezing about half the time. Yet, somehow, I still keep using them, and still keep swearing immensely when they break, destroying all of my hard work. Grrr.
 Add liquid. Adding water or stock to the jar protects the vegetables from freezer burn and any potential spoilage, and it’s likely that whatever you’ll cook with the base will include some liquid anyway. You don’t have to add a lot; fill the jar to just shy of the desired head space, then top off with liquid. Remove any air bubbles like you would with jam or pickles, then push any vegetables below the liquid level.
Loosely cover. Especially for Ball jars, I don’t screw down the band when I move a jar to the freezer; that way if the jar contents need to expand beyond the available head space, they have somewhere to go (rather than simply out, breaking yet another jar). Once jars are fully frozen, I cover tightly and store in the chest freezer.
Label, label, label. Before it goes into the fridge. Contents, amount if relevant (i.e. “1 batch chicken soup base”) & date. I also note any changes to a standard recipe, or if I tend to store things both ways, like “pesto, no cheese,” or “gumbo base, no okra.”
Chill out. Allowing soup base to chill in the fridge prior to freezing not only prevents your freezer from warming up too much due to warm/hot jars placed inside, it protects glass jars from breaking due to thermal shock. I usually stick mine in the fridge overnight, top off with a bit of water in the morning if the contents have settled, and then freeze.
Use within 1 year. Or thereabouts. I’d be lying if I said I didn’t occasionally pull out something from three years ago that was lost in the nether reaches of the freezer. But generally, I try to preserve for the season, not for the impending zombie apocalypse. Everyone knows zombies don’t eat soup.
 RECIPES
Leek Mirepoix
- baby leeks, cleaned well and thinly sliced crosswise
- carrots, scrubbed, peeled and thinly sliced crosswise
- celery, including leaves, scrubbed, trimmed and thinly sliced crosswise
- garlic, minced (1 clove = approximately 1 tsp minced)
- butter and/or olive oil
- salt
- In a large Dutch oven or heavy-bottomed skillet, melt the butter or olive oil over medium heat. Combine roughly equal amounts of sliced leeks, carrots, and celery in the pot. Add about 1 clove of garlic for each quart of chopped vegetables. Sprinkle with a generous pinch of salt. Sauté, stirring frequently, until vegetables are softened and fragrant (cooking time is dependent on how much mirepoix you make at one time. Figure about 5 minutes per quart of vegetables).
- Allow to cool slightly, then transfer to glass containers. If freezing in plastic, allow mirepoix to cool completely, then transfer. Add a splash of water to the top of the container, then press the vegetables down, eliminating air bubbles with a chopstick, and top with a layer of water, keeping at least 1-inch of head space for freezer expansion. Label containers with contents & date. If freezing in glass, allow jars to chill overnight in the refrigerator prior to transfer to the freezer.
Yield: assume approximately 3-to-1 decrease in volume of cooked veg; i.e. 3 quarts chopped = 1 quart cooked mirepoix.
 Spanish Sofrito (adapted from Ferran Adria)
- ½ cup olive oil
- 1 head garlic, cloves separated and peeled
- 1 ½ lbs white or yellow onion, peeled and coarsely chopped
- 1 tsp dried thyme
- 1 stalk fresh rosemary
- 1 bay leaf
- large pinch salt
- 1 lb tomatoes
- freshly ground black pepper
- paprika
- In a large skillet, heat the olive oil over low heat. Add the garlic cloves to the bowl of a food processor and chop until finely minced. Add garlic to the skillet and fry, stirring frequently, until garlic is golden brown.
- Add onions to the food processor and process to a smooth purée. Add onion purée to the garlic; stir, reduce heat, and simmer, stirring occasionally, until onion volume is reduced by about half. Raise heat to medium-high and, stirring constantly, fry onion mixture until fragrant and browned, with little to no water remaining. The total time for cooking down the onion may take an hour or more.
- Quarter the tomatoes and add to the food processor. Process for a few minutes for a fine purée. Push through a food mill or sieve to remove cores and seeds. Add tomatoes to the onion mixture. Stir, reduce heat, and simmer, stirring occasionally, until the mixture is thick and fragrant, close in texture to a tomato paste, about 30 – 60 minutes.
- Freeze in ice cube trays (spritz the trays with cooking spray to ease removal) or in 4-oz canning jars.
Yields about 20, 2-tablespoon cubes.
 OPTIONS
- For less than a marathon chopping & freezing session, consider the one-for-the-pot and one-for-the-freezer method: make a double batch of vegetable base for whatever soup or stew you are preparing for dinner. Once vegetables are cooked down, remove half to the freezer; keep the rest in the pot for dinner. Do this when you have extra vegetables on hand and you’ll never be short of a quick frozen base for busy nights.
- I doubled the tomato in Ferran Adria’s sofrito and I think it could have used even more. Next time I would try 2 lbs of tomatoes.
STORE
Store frozen for up to 1 year.
SEASON
Harvest.

I love this post! Especially the fact that you say “wear comfortable shoes” under the PREPARING & FREEZING SOUP BASE section. I am usually in the kitchen barefoot. If I am in there for long periods of time, I remember I should have put on some shoes….
I have a pair of Danskos that I LIVE in in the kitchen. So much so, that when I am cooking at someone else’s house, it only takes me about 5 minutes of feeling “off” to figure out that I’m missing my Danskos!
I have never put a jar in the freezer without it breaking. Once, on vacation, I put a one-and-a-half pint, wide-mouth jar HALF full of water in the freezer. No lid. It cracked by morning.
Okay, I lied. I did once freeze chopped green onions in a glass jar. The jar did not break but I hate to use them because I hate touching the freezing jar AND the sound the towel makes when I pull it from the jar if I use a towel to not have to touch the jar.
#patheticpreservingproblems
I’ve had good luck with the Ball wide mouth jars, but as I say, the regular mouth quart jars are an exercise in frustration. Try Weck for freezing (if you’re feeling splurgey). I’ve never broken a single one. Or, by all means, freeze in plastic: just don’t microwave the plastic. That’s bad news.
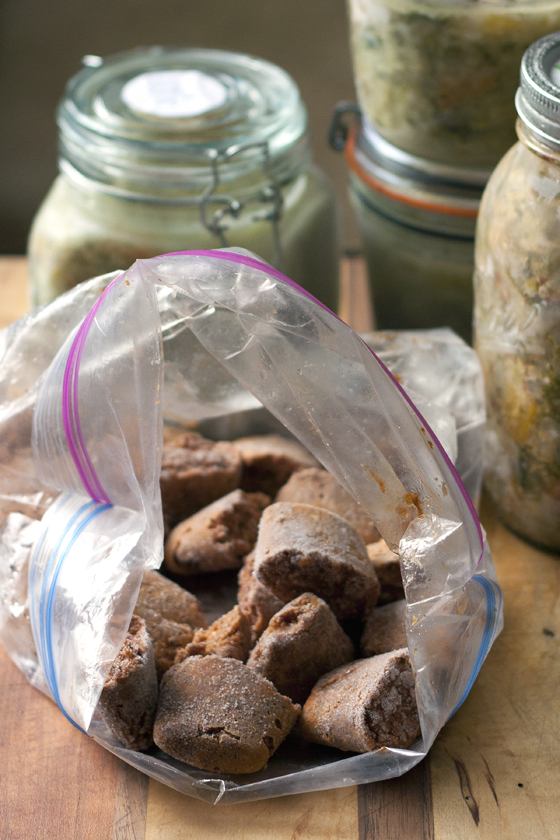
Yes, I’ve given up on freezing in jars. I’ve taken to Ziploc bags, and just run them under water until they get to the point I can squish out the contents. Or cut them open when I’m feeling splurgey.
I make a sofrito I love (onions, bell peppers, hot pepper, plum tomatoes, garlic, cumin, cilantro, oregano) in the food processor. I freeze it in muffin tins and then put the frozen pucks in a plastic bag. I mix it with OJ for a quick marinade, mix it into a chopped tomato for a quick salsa, or most often, cook in oil until aromatic and then mix with black beans.
Sounds fabulous, Sara.
Sarabarry do you have the reipe to share?
I’ve just got to say that I love the scattered pictures within the text. It really brings the post alive.
Great ideas! Fall can be insane! I’ve done frozen sofrito before (more peppery though) but love the soup base idea. Way better than my chopped celery rock (even after freezing spread out). I usually freeze in pyrex–with wide mouth canning jars as my backup, and an occasional bag of [fill in the blank] cubes.
Hate to admit I’m looking forward to frost…
Reblogged this on jillabenson and commented:
note to self: make more soup
What a great idea!! Currently I have green onions, yellow onions, and celery coming out my ears. Okay not literally but it sure does feel like it! Can you guess what I am doing tomorrow? That is after I finish clearing out and reorganizing the freezer since my refrigerator is now filled to the brim with all the chicken stock I made yesterday. I made roasted butternut squash soup today which my husband absolutely loved which is a miracle in itself as he has always vehemently proclaimed that he HATES all squash!
Your pictures are great! This is certainly a very colourful recipe 🙂
So easy to just skip the jars and freeze this in muffin tins. Then pop out the frozen rounds and use a FoodSaver to vacuum pack them… or just throw a bunch of the frozen discs in a ziploc gallon bag. When making a soup, just pull out the number you want and you’re in business.
I use a sillpat baking sheet and pile things into a dinner quantity for me and my meaner half. The flexibility makes it easy to get off and put in a gallon plastic bag or vacuum sealed bag. It works also for greens cooked then frozen.